A LITTLE BIT OF EVERYTHING
Day by Day Insights
DIY Kitchen Reno 2021
One of my 2021 Goals was to complete my DIY Reno for @TheAybarKitchen, and I finally completed it this August.
This project (like all the other ones) took longer than I expected. I began prepping for this in March, by May I began the demo and hired contractors to help me with the floors and countertop because I’m only one person, with 1,000 things to do.
I went through so many design ideas before going with a minimalist contemporary + modern farm style design. My kitchen is the reason I moved into this apartment almost 7 years ago and the foundation of The Aybar Kitchen. Although it’s spacious and had potential, for years my kitchen floor has been unleveled and I found out why during the reno.
Inspo Design I
Inspo Design for Tiles
Inspo Design II
This building was first built in The Bronx in 1928 and not only did we discover I have plaster walls behind my drywall. I had four layers of floors under my tiles, not to mention the mold from the poor plumbing under the sink (the smell is horrible - imagine dealing with this for an entire year). I have been trying to get my landlord to take care of these issues since 2018, and if I continued to wait, I’d still be in the before.
Breaking down the design plan for the reno, this is what was done:
Replaced Tiles with Vinyl Plank Floors (Lifeproof-Trail Oak)
Replaced Countertop (Ikea’s Oak effect/laminate - Butcher Block Style)
Plaster + Paint Ceiling
New Subway Wall Tiles (White with Black Grout)
Add Shelves (Use extra countertop slab)
Replace Base Molding (5”1/2)
Electrical: Replaced + Update Light Fixtures + Outlets to Black
- Outlets (Regular)
- Outlets (GFCI)
- USB Port
- Outlet Covers
- Light Switches
- Light Switch CoversPowder Coat Paint Pipe + Stools
Update Faucet + Soap Dispenser
New Kitchen Sink
Paint Walls + Ceiling White
Update Microwave + Stove
I started with the pipes and stools using Rust-oleum Paint + Primer for Metal to spray paint them black. This process is very messy, similar to powder coating, spray painting leaves tiny residue everywhere! I’ve done it a few times when I painted my radiators and renovated the bathroom (see this project here), you spend more time cleaning up after than painting.
I saved myself about $100 repainting the stools, rather than selling them and purchasing new ones.
After this, I still had to wait a few weeks before the contractors I worked with were available, I began the demo by ripping off the tile floor using a crowbar and hammer. There were some areas I left intact (like the stove/fridge) to not have open holes. The underlayment was exposed for about a month before we began work.
When the contractors began we expected to complete the entire project within a week, but after removing the remaining tiles from the floor, under the cabinet, and the wall tiles there was a bigger mold issue at hand. Again, I had over a year of dealing with the mold under the cabinet but was not expecting what I saw.
We discovered Plaster behind my drywall and it was barely holding up behind the sink. The mold damaged the plaster wall from water leaks, and we literally pulled it off with our hands. Plaster is really hard to break through and it hardens more over the years, so this was evidently caused by years of damage and the most recent leak in January 2020 that my landlord never came to repair.
Since we ran across this issue I also discovered another outlet hidden behind my dry wall and ran new wiring and added another outlet on top of the cabinets to hide the under cabinet lights wire and for the microwave range hood.
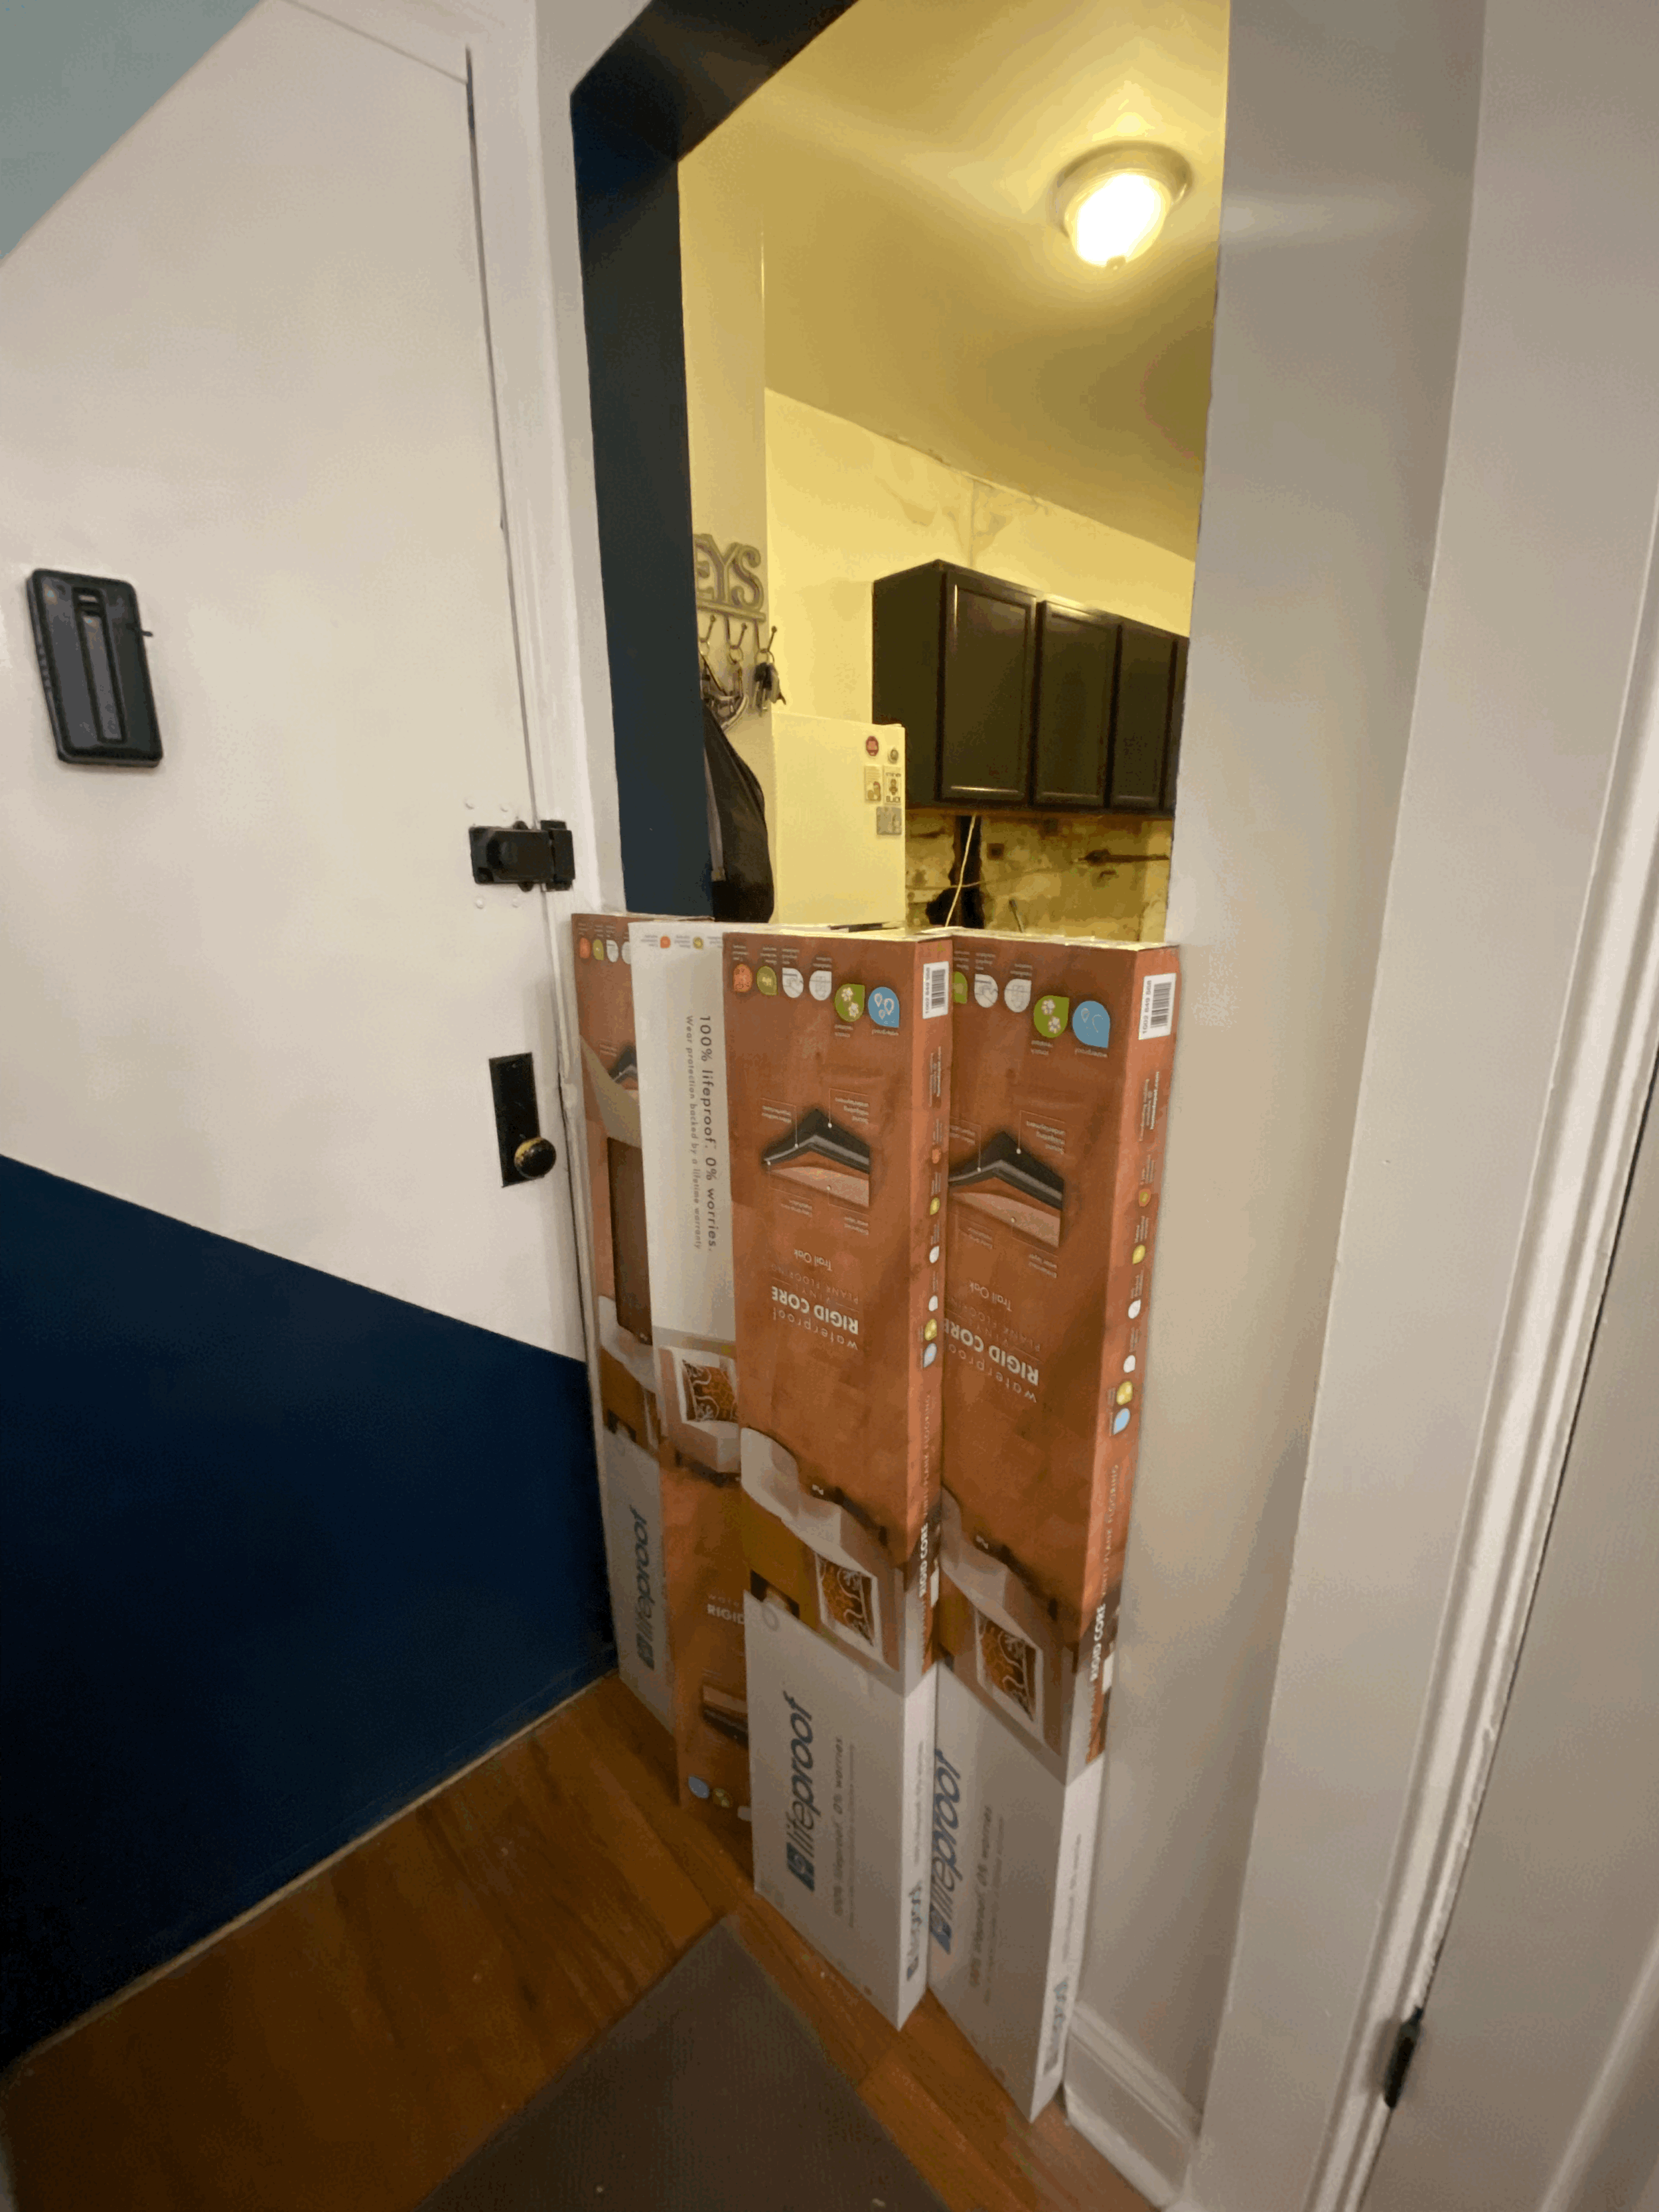
I had to keep that hole open for an entire weekend and blocked it off with the new floors just in case a rodent wanted to try and pay me a visit.
Once the wall was resealed, we restructured the sink cabinet with thick plywood, which helped save me money by not having to purchase a new one. The countertop was installed, we then cut and laid out the wall tiles, and moved on to painting the cabinets.
First, I primed them with Behr Acrylic Alkyd Enamel Primer before painting them with Behr Cabinet & Trim Enamel Interior Semi-gloss Paint, using a small roller and brush. My good friend Ed at Home Depot on Gunhill (The Bronx), helped me out a lot with the best way to paint them by hand. Originally, I was going to spray paint them with a gun but the gun I borrowed wasn’t working and I had to complete the task manually.
I lightly sanded them down before priming them.
I updated the light fixtures and outlets to black, although one of the GFCI outlets gave me trouble. Getting electrocuted isn’t fun! Please do not attempt this if you’re not certified or trained.
I only replaced two appliances, my small microwave that sat on top of my fridge, for a range hood style microwave, and my stove. I purchased my appliances at PC Richards & Sons. The microwave is a JVM GE Model and my beautiful Kitchenaid Stove, as I mentioned in the video, I was able to get on a deal. I fell in love with it from the minute I saw the double oven and even more when I found it was blue inside! It has a sabbath mode feature (I’m not Jewish but I do practice a 30 Day Sabbatical Fast annually and this is ideal).
KitchenAid 6.0 cu. ft.
Double-oven gas range
+ Self-cleaning system
+ Double Oven
+ Sealed Burners
+ Prep multiple dishes
+ Sabbath Mode
I left painting for last after the appliances and baseboards were installed, I used Behr Primer + Paint Ultra Pure White for both walls and the ceiling, two coats to cover and complete. Please be advised painting a ceiling is way harder than it appears, but an awesome upper body workout too. I was able to install shelves using some of the countertops that were leftover and added handles to the cabinets.
Finally, one of the last esthetics that revamped the entire kitchen was moving the fridge to the opposite wall facing the window. I host a lot of events, and the kitchen is where everyone gathers while meals are being prepped. Having the fridge right next to the sink was uncomfortable and was in the way, now in its new location is opens the room for people to stand freely without having to move out of the way.
During the process, I got asked (a lot) why I invested in this project when I don’t own the property? I provide a service out of my kitchen and even if it’s a private setting, I’m accountable for abiding by state laws when it comes to Food Service. I’ve worked in various commercial kitchens and food safety and cooking ethics are a priority. This Kitchen also serves as a Lab where I teach my interns how to cook, etc. Plus who wants to eat at a restaurant with an unattractive kitchen setting?
I’m super ecstatic with my new renovated Kitchen and was able to test it for a private wedding we hosted at Parkside Place just a day after completing reno the first week of August. This private event really put us on a deadline to finalize the project, and it was also a success (I’ll be sharing a blog about that event soon). In total, I spent around $800 in materials to revamp the kitchen, the full project cost me $3,000-$3,500.
I really have to thank my Dad, who’s been a Superintendent since I was 3 years old. I learned and mastered a lot of my handy woman skills from him, from locksmith to plaster and paint, carpentry, electrical, plumbing and more.
We’ll be reopening The Aybar Experience with Invites only for Aybar VIP Clients and Members at The Aybar Kitchen.
DIY Bathroom Reno 2021
In December 2020 I began planning a bunch of Interior Design Home DIY projects.
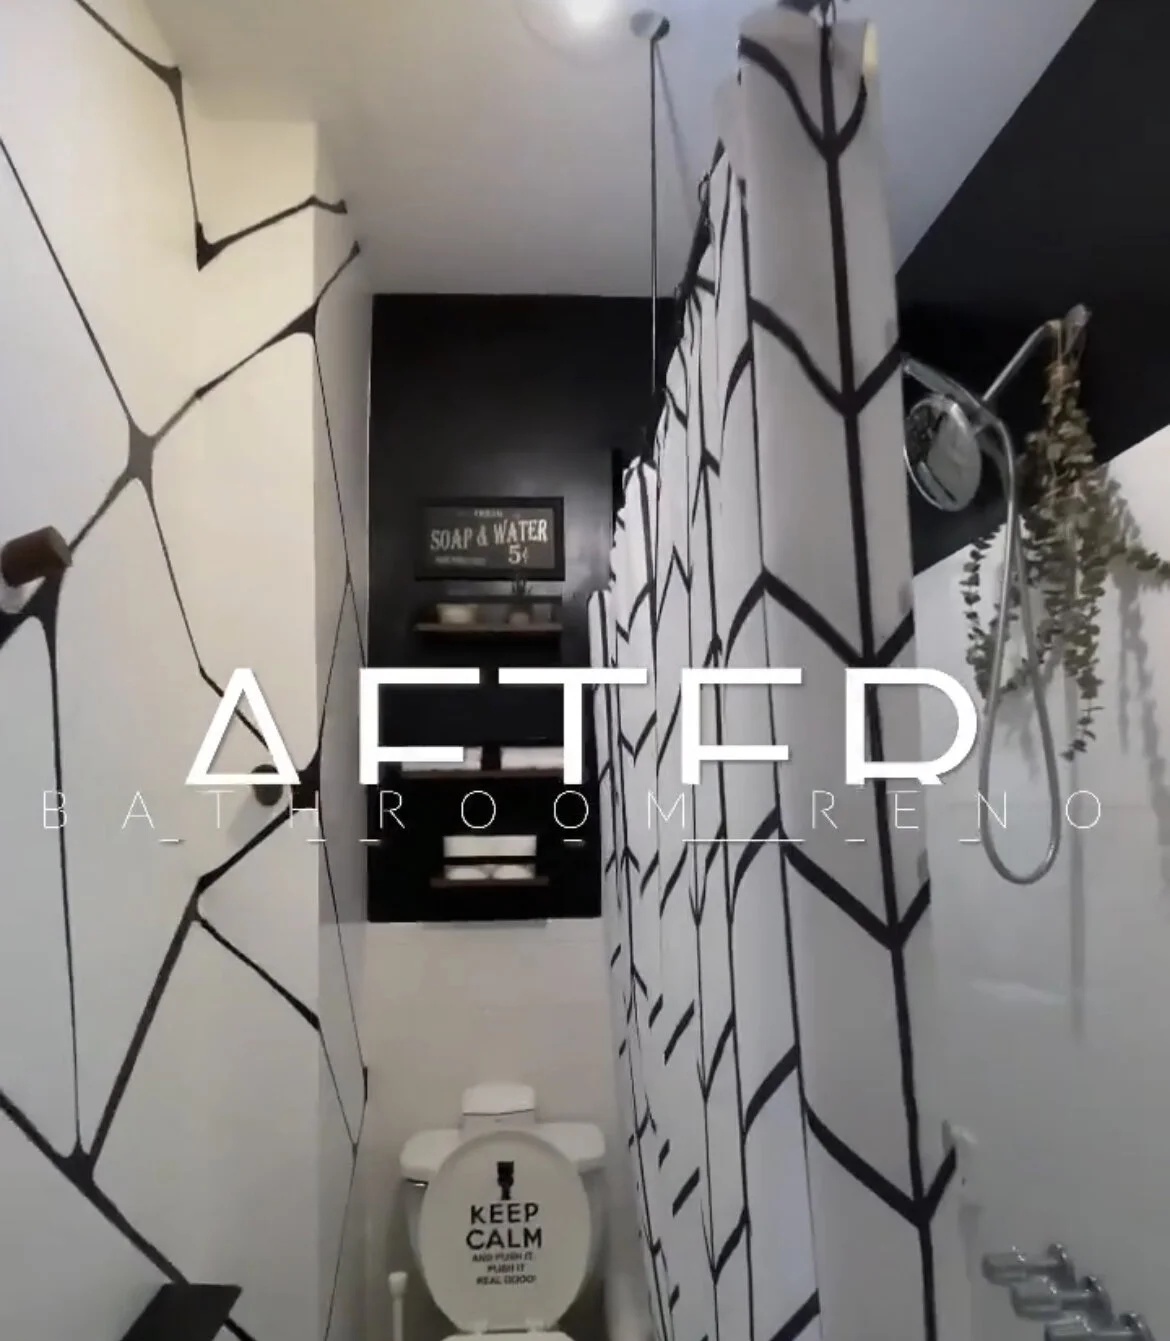
The bathroom was the first completed project. I started in April and took me about a week to complete.
Powder Coated Painted the Pipe
Removed the old towel and toilet paper holder
Patched + Plastered the holes
Painted (Including Decor Sign)
Changed the Door handles + hinges to Black
Electrical: Replaced Light Fixture + Outlets to Black
Completed Abstract Design
Replaced Baskets with Shelves
The abstract design took me about 8 hours to complete and was the longest part but it’s what gives the bathroom this entire vibe! The original Inso was a wallpaper, but me being me I wanted to create it free-handed and I’m so glad I did. My dad is a Superintendent and I learned the majority of my handyman skills from him.
I plan to update the sink and faucet fixtures to black in the near future.
Sweet Potato + Black Beans Quesadillas
I prepared this dish over the weekend and my followers went bananas! As promised here’s the recipe below, this was SUPER easy to make. It’s creamy, filling and satisfying, it a great dish for guests, the family or even for one person to devour alone.
Vegan + Dairy Free
Gluten Free
Nutritional + Wholesome Ingredients
100% Plant-Based
Allow me to first mention all the great benefits, filled with nutrients and antioxidants. Sweet potatoes are rich in vitamin A, vitamin C, potassium, and vitamin E. Black beans are packed with protein, fiber, iron, folate, phosphorus, thiamin, and riboflavin. Cashews + Avocados provide healthy fats, protein, and a creamy consistency for the filling. Nutritional yeast. Nutritional yeast adds a “cheesy” flavor and is packed with B vitamins. with nutrients and antioxidants.
After going plant-based in 2019, I made it my business to make the plant-based version, without meat and all it took was removing the meat to master it with the same great test.
The secret is all in the spices and seasoning. Enjoy this recipe from The Aybar Kitchen.
INGREDIENTS
Quesadillas:
6 Whole Wheat Tortillas (white, or gluten-free optional)
1 Tbsp EVOO (Extra Virgin Olive Oil)
1 Small Onion diced
1 Tbsp Minced Garlic
1 can black beans, drained and rinsed
1/2 tsp chili powder
1/2 tsp chipotle powder
1/2 tsp ground cumin
1/2 tsp smoked paprika
1/4 tsp salt
1/4 tsp black pepper
“Cheesy” Sweet Potato Filling:
2 large sweet potatoes, cubed (~3 heaping cups)
1/2 cup cashews
1/4 cup nutritional yeast
2 tbsp almond milk
1 tbsp lemon juice
1/4 tsp salt
1/4 tsp black pepper
For Serving:
Salsa
Avocado
Don’t forget the Secret Ingredient: Add Love!
RECIPE
Prep Sweet Potatoes: Boil cubed sweet potatoes for 15-20 minutes or until tender and cooked through. After, drain water.
Prep Cashews: Bring several cups of water to a boil. Add cashews to a bowl. Pour boiling water over the cashews and soak for 15-20 minutes. After, drain water.
Prepare “Cheesy” Sweet Potato filling: Add Sweet Potatoes, Cashews, Nutritional Yeast, Almond Milk, Lemon Juice, Salt + Pepper to a blender. Blend on high-speed until smooth and creamy.
On a medium-low skillet, add EVOO, Diced Onion, & Minced Garlic. Sauté for 5 minutes, then add Black Beans, Chili Powder, Chipotle Powder, Ground Cumin, Smoked Paprika, Salt + Pepper. Sauté for 5 minutes.
Spread “cheesy” sweet potato filling across half a tortilla, add several spoonfuls of the black bean and corn mixture on top. Fold tortilla in half.
Cook quesadillas: On a separate skillet bring heat to medium temperature. Add 1 tsp oil or spray with nonstick cooking spray. Carefully transfer quesadilla onto the skillet. Cook for 1-2 minutes or until golden brown. Gently flip to cook the other side for an additional 1-2 minutes. Remove and slice into triangles.
Serve quesadillas and enjoy with salsa, Avocado (add some lime + salt)or enjoy alone.


